If your clothes aren’t coming out as fresh as they should or your machine has started to smell musty, a clogged filter could be the hidden culprit. Many homeowners overlook this small but essential component, leading to drainage issues, longer cycles, and unexpected error codes. This guide is designed to help you quickly diagnose and fix the problem through proper washer filter maintenance. Based on extensive hands-on appliance care experience and proven maintenance practices, we’ll walk you step by step through locating, cleaning, and maintaining your filter to restore performance and extend your washing machine’s lifespan.
Why This Small Part Creates Big Problems
Your washing machine’s filter—often called a pump filter or debris trap—is a small component with a big responsibility. In simple terms, it’s a protective screen that catches lint, hair, coins, and buttons before they reach the drain pump. The drain pump is the part that pushes used water out of the machine. If debris reaches it, damage can follow (and repairs aren’t cheap).
When the filter clogs, problems stack up quickly:
- Poor draining: Water lingers in the drum because it can’t exit efficiently.
- Unpleasant odors: Trapped debris decomposes, creating smells that cling to clothes.
- Excessive vibrations: The washer shakes as it struggles to expel water.
- Longer cycle times: Restricted flow forces the pump to work harder.
- Error codes: Modern machines display drainage-related alerts.
- Water leaks: Severe blockages create pressure that forces water outward.
Some argue filters rarely need attention because machines are “self-cleaning.” That’s misleading. Self-cleaning cycles help the drum, not the debris trap. Skipping washer filter maintenance can quietly shorten your appliance’s lifespan.
Think of it like a sink strainer: ignore it long enough, and you’ll be ankle-deep in consequences (not exactly a sitcom moment). Regular checks keep performance smooth and prevent avoidable breakdowns.
Finding Your Machine’s Debris Filter
Before you can clean the filter, you need to actually find it (easier said than done sometimes). Its location depends on your washer type and model, but here’s where to look first.
Front-Loading Machines:
The filter is usually at the bottom-front of the washer, tucked behind a small square or rectangular access panel. You may need a flathead screwdriver to gently pry it open. Place a shallow tray and towel underneath before opening—water often drains out.
Top-Loading Machines:
These vary more:
- Inside the central agitator (lift off the top cap)
- A mesh screen near the water inlet hose
- Along the drain hose
- Some models have self-cleaning filters (no manual cleaning required)
Your Best Resource:
Check your owner’s manual. Search your washer’s model number online to find a digital copy in minutes.
Knowing the exact filter location makes washer filter maintenance faster, cleaner, and far less frustrating.
The Definitive 6-Step Filter Cleaning Process
I’ll be honest: cleaning your washer filter sounds like one of those chores you’ll “get to eventually.” But in my opinion, waiting is how you end up with mystery smells and a machine that sounds like it’s chewing gravel. The good news? This takes less than 15 minutes.
Step 1: Prepare Your Area
First, unplug the washing machine. Always. Water and electricity are not a dynamic duo. Lay old towels in front of the access panel and place a shallow pan nearby to catch water.
Step 2: Drain the Residual Water
Next, open the access panel. You’ll see a large round filter cap and a small rubber drain hose. Uncap the hose and let the trapped water flow into your pan. Take your time here—rushing just creates a puddle (ask me how I know).
Step 3: Remove the Filter
After draining, recap the hose. Slowly turn the large cap counter-clockwise. Expect a little extra water. Then pull the filter straight out.
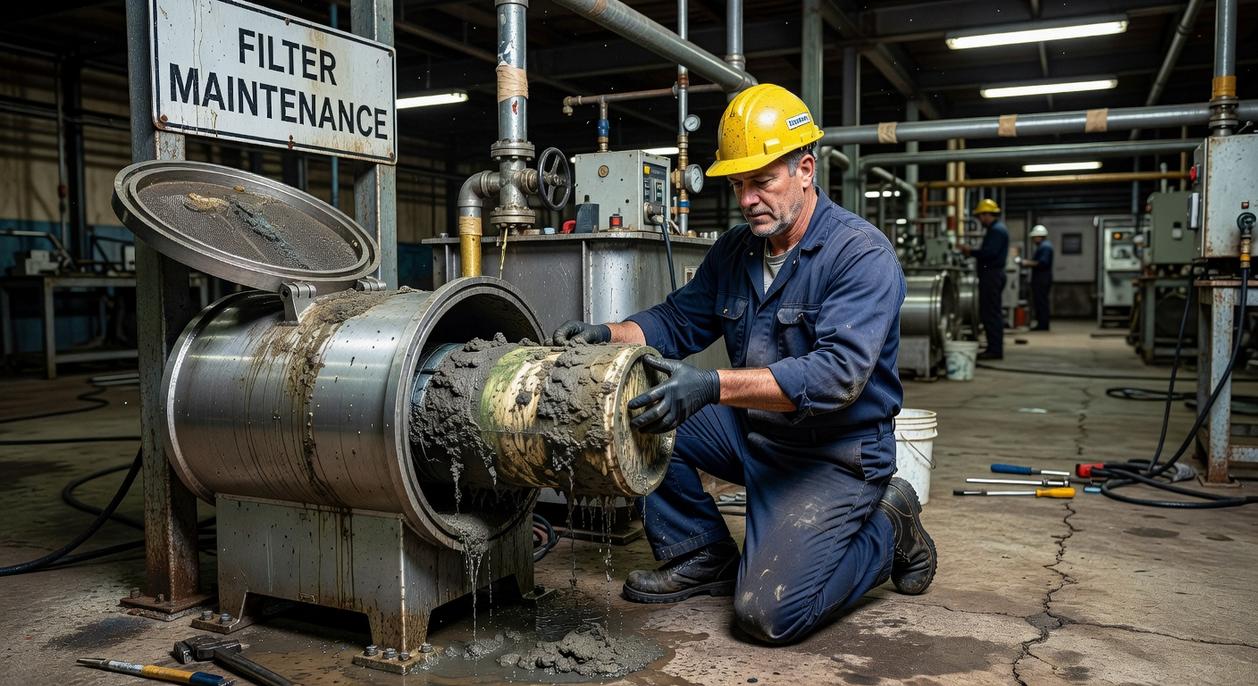
Step 4: Clean the Debris Trap
Remove lint, hair, and any foreign objects—coins, bobby pins, the occasional LEGO. Rinse under warm water and scrub gently with an old toothbrush. If the filter looks cracked or warped, replace it.
Step 5: Clean the Filter Housing
Before reinserting, wipe inside the housing with a cloth or paper towel. Skipping this step defeats the purpose of proper washer filter maintenance.
Step 6: Reinstall and Test
Finally, slide the filter back in, tighten it clockwise until snug, close the panel, and run a short “Drain & Spin” cycle. Check carefully for leaks.
If you’re wondering how often this matters, here’s a helpful guide on how often should you service your washing machine. In my view, small maintenance beats expensive repairs every time.
Creating a proactive maintenance schedule keeps your laundry room humming instead of groaning. Cleaning your filter should never feel like a frantic, one-time rescue mission. Think of it as seasonal care, like changing the air when you open the windows in spring.
For most households, a steady rhythm works best: clean the filter every three to four months. Mark it on your calendar and notice the difference—the washer sounds smoother, water drains with a steady hush, and clothes come out smelling fresh instead of faintly musty.
Some argue modern machines can handle neglect. They can’t. If you own heavy-shedding pets, run loads daily for a large family, or tackle gritty uniforms and grass-stained jerseys, step it up to every one or two months. The lint feels thick between your fingers; that’s your cue.
Set a reminder and treat washer filter maintenance as non-negotiable. Your machine will thank you with rinses.
Enjoy Fresher Laundry and a Healthier Machine
I’ll admit it: I ignored my washer’s filter for years. When that damp, swampy smell crept into freshly washed towels, I blamed detergent. When the drum drained slowly, I blamed the machine. I was wrong.
The real issue was a clogged filter choking the pump. Once I started washer filter maintenance every few months, the odor vanished and cycles ran smoothly. Lesson learned: small neglect creates big problems.
A clean filter protects performance and prevents costly repairs.
Fifteen minutes now saves frustration later (and keeps your laundry from smelling like a forgotten gym bag). Pro tip: set a seasonal reminder so you never forget again.
For those who also want to enhance their outdoor spaces, don’t forget to check out our Yard Guide Decadgarden for tips on maintaining your garden alongside your washer filter care.
Keep Your Washer Running Like New
You came here to understand how to protect your washing machine and avoid the frustration of poor performance, bad odors, and costly breakdowns. Now you know that consistent washer filter maintenance is the simple step that keeps everything flowing the way it should.
Ignoring that small filter can lead to drainage problems, trapped debris, and expensive repairs — exactly the headaches you were trying to prevent. A clean filter means fresher laundry, better efficiency, and a longer-lasting machine.
The next step is simple: check your washer filter today and set a reminder to clean it regularly. If you want more expert-backed tips on keeping your home and appliances in pristine condition, explore our trusted guides and maintenance resources now. Thousands of homeowners rely on our proven advice to prevent problems before they start — and you can too. Take action today and keep your washer performing at its best.
 Founder & CEO
Ask Torveth Tornhaven how they got into washing system maintenance tips and you'll probably get a longer answer than you expected. The short version: Torveth started doing it, got genuinely hooked, and at some point realized they had accumulated enough hard-won knowledge that it would be a waste not to share it. So they started writing.
What makes Torveth worth reading is that they skips the obvious stuff. Nobody needs another surface-level take on Washing System Maintenance Tips, Pristine Home Care Techniques, Home Living Highlights. What readers actually want is the nuance — the part that only becomes clear after you've made a few mistakes and figured out why. That's the territory Torveth operates in. The writing is direct, occasionally blunt, and always built around what's actually true rather than what sounds good in an article. They has little patience for filler, which means they's pieces tend to be denser with real information than the average post on the same subject.
Torveth doesn't write to impress anyone. They writes because they has things to say that they genuinely thinks people should hear. That motivation — basic as it sounds — produces something noticeably different from content written for clicks or word count. Readers pick up on it. The comments on Torveth's work tend to reflect that.
Founder & CEO
Ask Torveth Tornhaven how they got into washing system maintenance tips and you'll probably get a longer answer than you expected. The short version: Torveth started doing it, got genuinely hooked, and at some point realized they had accumulated enough hard-won knowledge that it would be a waste not to share it. So they started writing.
What makes Torveth worth reading is that they skips the obvious stuff. Nobody needs another surface-level take on Washing System Maintenance Tips, Pristine Home Care Techniques, Home Living Highlights. What readers actually want is the nuance — the part that only becomes clear after you've made a few mistakes and figured out why. That's the territory Torveth operates in. The writing is direct, occasionally blunt, and always built around what's actually true rather than what sounds good in an article. They has little patience for filler, which means they's pieces tend to be denser with real information than the average post on the same subject.
Torveth doesn't write to impress anyone. They writes because they has things to say that they genuinely thinks people should hear. That motivation — basic as it sounds — produces something noticeably different from content written for clicks or word count. Readers pick up on it. The comments on Torveth's work tend to reflect that.