I’ve cleaned more vacuum cleaners than I care to admit, and I can tell you this: most people wait way too long.
Your vacuum is probably working harder than it should right now. Weaker suction. Strange smells. Dust puffing back into the air instead of staying trapped.
You don’t need a new vacuum. You need to clean the one you have.
How to clean a vacuum cleaner livpristwash starts with understanding that your vacuum is basically a dust magnet that never gets washed. Think about that for a second.
I’m going to walk you through the exact process I use to restore any vacuum to peak performance. Bagged or bagless, it doesn’t matter.
I’ve tested these steps on everything from cheap uprights to expensive canisters. The routine works because it targets the three things that kill vacuum performance: clogged filters, packed brushes, and trapped debris in places you’ve never looked.
This takes less than an hour. You’ll need basic supplies you already have at home.
By the end, your vacuum will pull harder, smell better, and actually trap the dirt it picks up. Plus it’ll last years longer than if you keep ignoring the maintenance.
Let’s get your vacuum working like it should.
Why a Clean Vacuum is Your First Line of Defense
You probably think your vacuum is doing its job as long as it’s still turning on.
I used to think the same thing.
But here’s what most people don’t realize. A dirty vacuum isn’t just less effective. It’s actually making your home dirtier.
Some folks say you should just run your vacuum until it dies, then buy a new one. Why waste time on maintenance when replacements are cheap, right?
Here’s the problem with that thinking.
A clogged motor works twice as hard to do half the job. That means you’re burning through vacuums every year or two instead of keeping one running for a decade. (The math doesn’t add up in your favor.)
But the real issue isn’t your wallet.
It’s what’s happening in your air.
When your filter gets packed with dust and your canister fills up, you’re not just losing suction. You’re creating a perfect environment for bacteria and mold to grow. Every time you turn that vacuum on, you’re blowing those allergens right back into the rooms you just cleaned.
Think about it. Clean room versus contaminated air. Which one matters more?
Now compare two scenarios. A vacuum with a clean brush roll versus one caked with hair and debris. The clean one actually lifts dirt from your carpet. The dirty one just pushes it around.
Same goes for your filter and hose. Clear filter means strong suction. Clogged hose means you’re fighting with your machine instead of cleaning.
Learning how to clean a vacuum cleaner livpristwash style means you stop working against yourself.
Your vacuum should protect your home. Not compromise it.
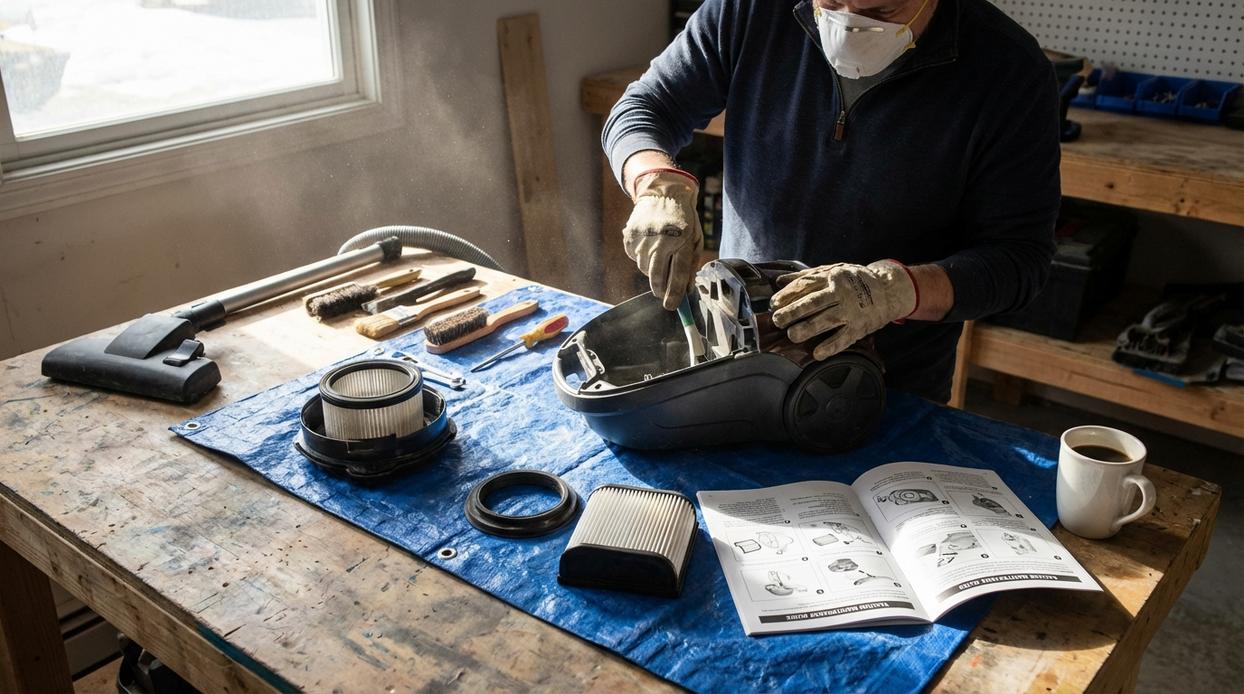
Your Essential Toolkit & Safety Checklist
Before you start, let’s talk about what you actually need.
I’m not going to send you on a wild goose chase for specialty products. Most of what you need is probably sitting under your sink right now.
Here’s what to grab:
Microfiber cloths (the ones you use for everything else work fine). Scissors or a seam ripper for cutting away tangled hair. A small brush like an old toothbrush. Compressed air if you have it. Mild dish soap. Maybe some disinfecting wipes if you’re feeling fancy.
That’s it.
Now here’s the part that sounds obvious but needs saying anyway.
Unplug the vacuum.
I know this feels like one of those “coffee may be hot” warnings. But you’d be surprised how many people skip this step because they’re in a hurry. (Remember that scene in Christmas Vacation where Clark gets electrocuted by the lights? Yeah, let’s not do that.)
This is your golden rule for how to clean a vacuum cleaner Livpristwash style. No power source connected means no accidents.
Pick your spot wisely.
Take this job outside if you can. Or at least to your garage or a room with hard floors. When you open up a vacuum that hasn’t been cleaned in months, you’re releasing what I call the dust apocalypse.
You don’t want that settling into your carpet.
Trust me on this one.
The Ultimate Step-by-Step Deep Cleaning Guide
Most people think vacuums are self-cleaning machines.
They’re not.
I learned this the hard way when my vacuum started smelling like a wet dog mixed with burnt rubber. Not great when you’re trying to clean your house.
Here’s what nobody tells you. Your vacuum works harder than almost any appliance in your home. It sucks up dirt, hair, crumbs, and whatever else is hiding in your carpet. All that stuff has to go somewhere.
And if you’re not cleaning it regularly? You’re basically pushing around a dirt spreader.
Some people say you should just replace your vacuum every few years instead of deep cleaning it. They think maintenance is too much work. I disagree. A $200 vacuum that you actually maintain will outperform a $500 one that you ignore.
Let me show you how to clean a vacuum cleaner livpristwash style. This is the method I use every month, and it keeps my vacuum running like new.
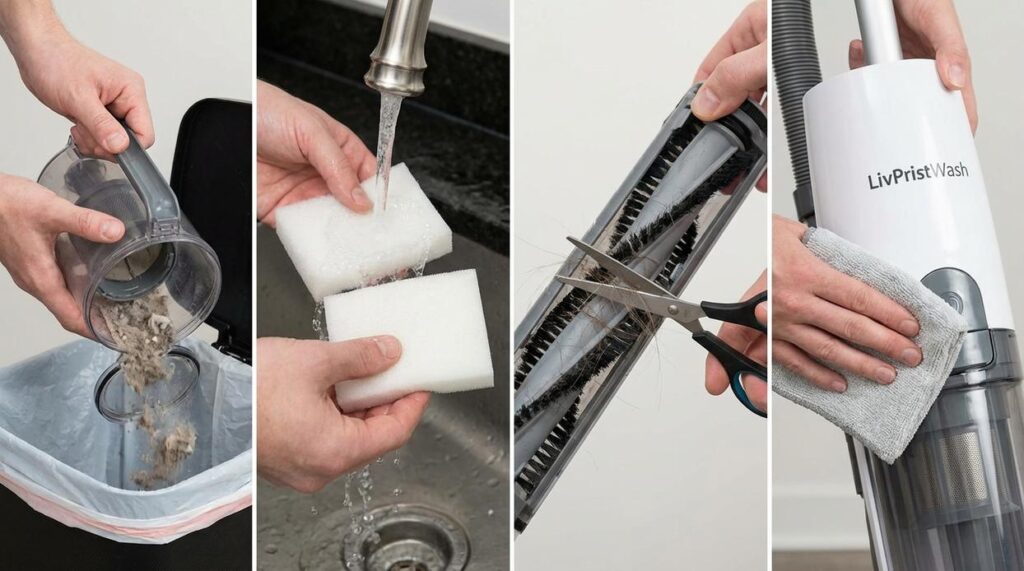
Step 1: The Dustbin, Canister, or Bag
Start here because it’s the most obvious part.
Pop open your canister and dump everything into a trash bag. Don’t do this indoors unless you want a dust cloud in your face (trust me on this one).
For washable bins, I use warm water and dish soap. Scrub the inside with a sponge to get rid of the grime that sticks to the walls. You’ll be surprised how much buildup there is.
Here’s the part people mess up. You need to let it dry completely. I mean bone dry. That takes at least 24 hours, sometimes longer if you live somewhere humid.
Put a wet canister back on your vacuum and you’re asking for mold. I’ve seen it happen and it ruins the whole machine.
Step 2: The Filters (Your Vacuum’s Lungs)
Your vacuum has filters. Usually foam, felt, or HEPA.
Most people forget they exist until their vacuum loses suction. How to Wash Laminate Floors Livpristwash is where I take this idea even further.
Check your manual to find where they hide. Usually behind a panel or under the dustbin. Pull them out and take a look. If they’re gray or brown instead of their original color, they’re overdue for cleaning.
For non-washable filters, take them outside and tap them against a hard surface. You’ll see a dust cloud that’ll make you wonder how your vacuum was even working.
Washable filters get the same treatment as the dustbin. Warm water, gentle soap, thorough rinse. Then you wait. And wait some more.
Never put a wet filter back in. This isn’t negotiable. You’ll short out the motor or grow mold. Neither option is good.
I usually clean filters on a Friday so they have the whole weekend to dry. For more detailed washing advice livpristwash style, check out our other guides.
Step 3: The Brush Roll (Beater Bar)
This is where things get gross.
Flip your vacuum over and look at the brush roll. See all that hair wrapped around it? That’s cutting your vacuum’s performance in half.
Most brush rolls pop out pretty easy. There’s usually a latch or a couple screws holding the cover plate. Remove that and slide the roll out.
Now grab scissors or a seam ripper. Carefully cut through the tangled mess. Work in sections and pull the hair away as you go. It comes off in satisfying clumps (if you’re into that sort of thing).
Clean the bristles with your fingers or an old toothbrush. Check the end caps too. Debris loves to hide there and it’ll keep your brush from spinning freely.
Wipe down the brush chamber while you’re at it. There’s always dust and crud stuck in the corners.
Step 4: The Hose and Attachments
Last step but it matters.
Detach your hose and hold it up to the light. Can you see through it? If not, you’ve got a clog.
I use a broom handle to push blockages through. Just be gentle so you don’t puncture the hose. Push from both ends until everything comes loose.
Wash the hose in your bathtub or a large sink. Run warm soapy water through it and swish it around. Same goes for your attachments and the crevice tool.
Hang the hose over your shower rod to dry. Give it a full day before you put it back on the vacuum.
Pro tip: While everything’s drying, wipe down the outside of your vacuum body with a damp cloth. It won’t make it work better but it’ll look less disgusting.
Once everything’s completely dry, put it all back together. Your vacuum will have better suction, smell better, and last years longer.
That’s the whole process. Takes about 20 minutes of actual work plus drying time.
Do this every month or two and you’ll never need to buy another vacuum.
Sanitizing Your Vacuum: Eliminating Odors and Bacteria Safely
Your vacuum smells like wet dog mixed with old carpet.
I know because mine did too.
Here’s what’s actually happening. Bacteria are feeding on the organic debris trapped inside your machine. Hair, skin cells, food particles. All of it becomes a buffet for microbes that produce those nasty odors.
A study from the University of Arizona found that vacuum cleaners can harbor significant bacterial colonies, including E. coli and Staphylococcus (yes, the same stuff that causes staph infections). Sanitizing kills these bacteria at the source.
The right way to sanitize:
Wipe down your canister with a disinfecting wipe. Get the exterior housing too. For non-electric attachments, use a cloth lightly dampened with a 1:1 vinegar and water solution. Vinegar is a natural antimicrobial that won’t leave chemical residue.
But here’s the critical part.
Never spray liquids directly into the motor housing or onto filters. I’ve seen people ruin $300 vacuums this way. Water and electronics don’t mix. You risk permanent damage and electrical hazards.
Some people argue that vacuums are self-cleaning because they’re constantly sucking up air. They say sanitizing is overkill.
They’re wrong. Research from NSF International shows that vacuum brush rollers rank among the top 10 germiest household items. More contaminated than toilet seats, actually.
Pro tip: Drop a cotton ball with a few drops of lemon or lavender essential oil into your clean canister. You’ll get a fresh scent every time you vacuum instead of that musty smell.
For more cleaning guidance, check out our home washing advice livpristwash section. Learning how to clean a vacuum cleaner livpristwash properly extends your machine’s life by years.
A Pristine Machine for a Pristine Home
You came here because your vacuum isn’t working like it used to. For additional context, Livpristwash Washing Guide by Livingpristine covers the related groundwork.
Maybe the suction feels weak. Or there’s a smell you can’t ignore. These problems don’t fix themselves.
I’m going to show you how to clean a vacuum cleaner livpristwash so it works like the day you bought it. This isn’t complicated but most people skip it completely.
A dirty vacuum can’t clean your floors properly. It spreads dust around instead of picking it up (which defeats the whole point).
The good news? You can fix this with a simple routine that takes less than an hour.
You now have a complete process for maintaining and sanitizing your machine. No more weak suction or musty odors.
This routine does two things at once. It gives you cleaner floors and protects the money you spent on your appliance. Vacuums that get regular care last years longer.
Keep Your Machine Running Like New
Set a calendar reminder right now for three to six months from today.
That’s when you’ll repeat this deep clean. It’s the difference between a vacuum that works and one that sits in your closet because it’s useless.
Your floors deserve better. So does your wallet.